Showing posts with label Seam Guides. Show all posts

Tuesday 9 February 2016

Disappearing Nine Patch - Part I

I have decided to start my sewing year with a quilt.  I've spent quite a while thinking about what I want to do with fabrics I already have and in the time I have available.

I have been reading up about disappearing nine patch quilts here, here and here.  I was taken with the setting which imitates sashing and corner stones and decided that might work with the fabrics I have to hand at the moment.

Working from the premise that my individual squares would be cut at five inches based on the common size of commercially available charm packs I began to do some sums.

My quilt will be made up of nine nine patches that's 84 individual squares which would equate to two commercial charm packs at 42 squares each.  These will be made up of:

  • Nine red for centre of the nine patch blocks - these will become the corner stones
  • Thirty-six cream for the middle patches on each side of the blocks - these will become the sashing
  • Thirty-six coloured prints for the corner patches of each block - I cut six of each from six different fabrics


Here are all the squares cut out nice and tidy - a couple of hours work over a couple of evenings last week.  Speed is of the essence with this project as I don't have loads of time and I need to keep the momentum up.

The next step was to chain piece nine red squares to nine cream and then set aside nine cream for later.


I am working on the Singer 201K1.   I have read that this is the correct designation for a Kilbowie built machine originally fitted to a treadle.  I recently shortened the belt on this one.  It has made a world of difference.  The belt must have stretched making it tricky to get the machine to start and stop.  It had a tendency to run backwards at the beginning, run-on when stopping and stalling altogether when crossing thicker seams.  I took about 3/8ths of an inch off the length for the time being and now the machine is performing faultlessly.

The thread is Gütermann 100% cotton and the machine is set to 15 stitches per inch. I used my trusty cloth guide to help maintain a scant quarter inch seam.  I chain pieced the 18 remaining cream coloured squares to 18 of the mixed colours, three of the six different fabrics.  This is the resultant heap of chain piecing.


I snipped the paired squares apart and had a bit of a tidy up.  Here are the paired up squares stacked on the treadle table prior to pressing.  I production lined my pressing.  Pressing all 27 pairs as sewn and then open with all seams away from the cream squares.  I tried letting all my pressing cool on the ironing board before moving the units.  I'm told it helps the pressed seam allowances stay put.


My next step was to add the remaining nine cream squares to the opposite edge of the red ones.


And then the remaining 18 mixed colours to the other pairs.  Selection of the mixed prints at this stage isn't too crucial.  The reason for this will become clear next time.


Much more pressing and the nine patches are starting to take shape!  From winding the bobbin to taking the last photograph took just under three hours.  A nice way to spend a blustery Sunday afternoon.


Sunday 22 September 2013

Has anyone ever heard of a Hussif?

I hadn't until I was chatting to follower Ken a week or two ago.  I thought I knew what he was talking about until Monday when I treated myself to a copy of the Merchant & Mills SEWING BOOK.  When I saw a photograph of their project Hussif I realised the picture I had in my head was well off beam.  It turns out that a Hussif is a pocket sewing kit with some whimsical etymology thrown in for good measure.

I am rather taken by the Merchant & Mills SEWING BOOK.  It's an aesthetically pleasing object in its own right and the projects inside are, for the main part, non-gender-specific which makes a welcome change for the male seamster.

As a confirmed old bachelor with some heavy unbleached calico on his hands I figured that a Hussif is the nearest I am likely to get to a housewife and resolved to knock one up [perhaps I should rephrase that!?]

Here are some pictures of my version

Pocket Sewing Kit - open

There are seven pockets for bits and bobs sewing notions.  I made mine the same size as the instructions but the book encourages makers to adjust pocket sizes to fit the objects in their own sewing kit.  The striped ticking covers two layers of cotton quilt wadding which form a pin cushion cum needle case.

Pocket Sewing Kit - closed

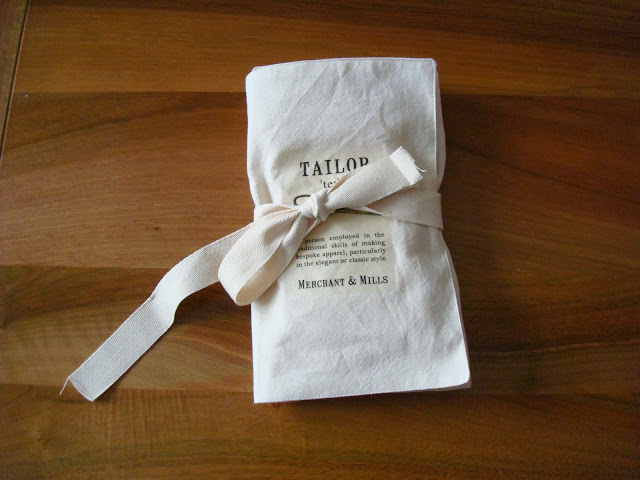
Here is the Hussif all furled up and tied shut.  To give you an idea of size the cotton webbing tape is 25mm (yes I've gone metric today) or one inch wide.  I may trim the tape down a bit once things have stretched out a bit.

The first of two big adventures in making this project was printing the downloadable Merchant and Mills graphic onto what can only be described as magic paper and then transferring this to the front of the Hussif using the iron.


I think I may have overcooked the transfer slightly and the instructions on where to position it were not Gavin-proof (I may have got the graphic upside down) but overall I am pleased with the effect.  I am left with some mixed feelings about putting a company logo onto an item I have made but I like the look of the finished project and I have tried out something I never would have done otherwise.  My mind is now teaming with ideas for some kind of Oil & Thread transfer.  Possibly featuring a hen if I can find copyright free image to use.

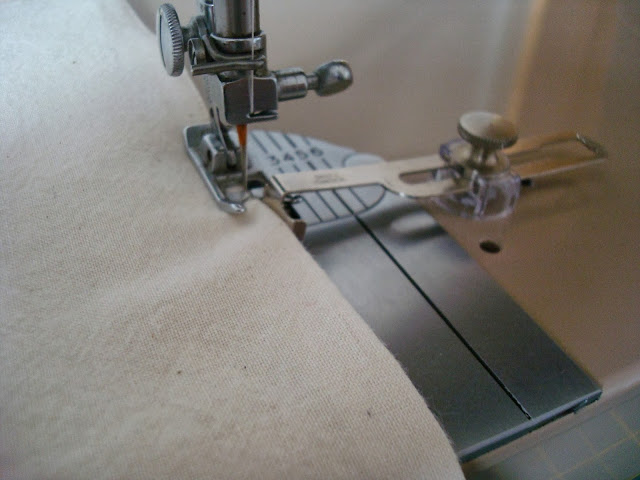
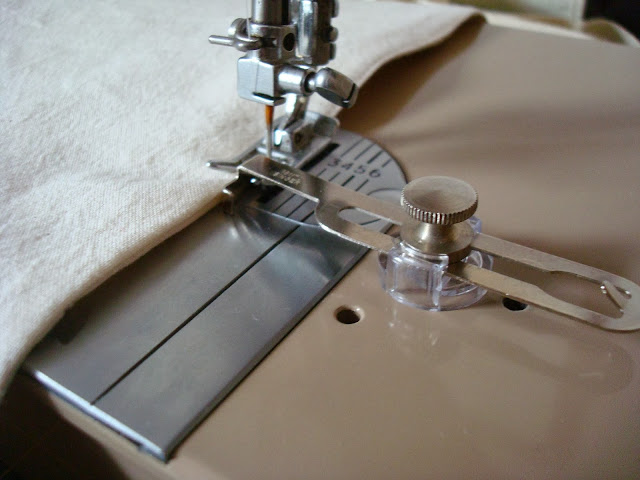
Adventure number two is a Singer 401G related discovery and one for the seam guide junkies amongst us (you know who you are).  I have discovered that the toe of the general purposes foot can be made to sit under the seam guide.  This is shown in the section of the Manual which shows how to blind stitch hems using the "BO" setting.  I realised that, with the needle centred (red lever at position 3), this gives scant ⅛ seam allowance.

Singer slant shank general purpose food and seam guide
Singer 401G: General purpose foot and seam guide

When would want a scant ⅛ seam allowance?  Well I found it handy when edge stitching the Hussif.  I hope you agree that the results are pretty tasty.


I am planning to hold on to this particular Hussif myself.  I have something in mind for it.  I really enjoyed putting this together.  It's a good way to spend a Saturday afternoon.  At this point in September I am thinking that one or two of these, filled with some 'heritage' style notions might make good Christmas presents.

Sunday 18 August 2013

Seam Guidance or This one's for Matt C

Of all the sewing machine accessories I own (and they have rather mounted up here over the last year) the one I use the most is my seam guide.  This is probably because I use old black sewing machines with no markings on their throat plates.  To the best of my limited knowledge there are two basic types of seam guide.  The first is quite heavy, T-shaped, and pictured left.  This is the kind that tends to come with black japanned Singers with gold decals.  The second is made of lighter pressed metal and plastic and tends to be found with the later tan, pale green and duck egg coloured Singers.

Early type Singer seam guide
Later type Singer seam guide


Both types will screw into either hole in the machine bed of a black Singer sewing machine [say a Singer 66 for instance Matt]  I've taken pictures just to prove my point.  Notice that the later type can be swivelled about to allow for sewing curved seams.

If you have a zig-zag machine you can also use this type of seam guide to help with making a blind hem.  I haven't done it yet myself but this operation is on my experimental to-do list
Now this is not, as you might think, a six inch/15 cm ruler.  It is, in point of fact, a knitting and sewing gauge.  I know this because it has this written on one end of it.  This gadget, with its sliding marker, has a number of uses.  I use it a lot to set up the seam guides on my black Singers, none of which have markings on their throat plates.
Sewing and knitting guage

Now although these old Singer are not marked in the way that a modern machine would be there are landmarks if you know how to read them.  I've tried to illustrate the first here.  This is the front one of the two screws which actually hold the throat plate on to the bed of the machine.  Check out the seam gauge.  If you use the right edge of this screw as a reference point you'll be sewing a quarter inch seam allowance.  This is useful for those who piece quilt tops and other patchwork projects.


The next land mark is the mystery hole nestling snugly in the D-shaped throat plate.  Don't look for one of these if you have a VS machine like a Singer 28, 27, 128 or 127 because I don't think you will find one.  I'm not entirely sure what the intended purpose of this hole is.  I think it might be something to do with an under-braiding attachment sold by Singer.  The other interesting fact is that by using this hole as a seam guide you will be sewing a ⅝ seam which just so happens to be the industry standard for home sewing patterns.  Don't believe me?  Check the sewing gauge - handy eh?


Now, without the aid of the seam gauge, if you have the older type of seam guide and thumb screw you have two useful default settings.  The first I wrote about last time is for a ⅜ seam allowance and the second is achieved in the following way.  Set the thumb screw in the threaded hold nearest the throat plate and position the flat side of the seam guide as close to the thumb screw as possible.  This creates a spacing of one inch.  I suspect that this might well come in handy for turning hems.


Some people have seam guides and use them, some people have sewn beautifully for decades and have never seen a seam guide never mind used one.  They were a standard in the accessory boxes for Singer sewing machines so millions must have been stamped out over the years.  Bear this in mind if you are going to buy one.  I wouldn't want pay more than a couple of pounds for one.  It might be more cost effective to buy a job lot of accessories that include a seam guide - mixed lots turn up regularly on ebay.  If you can find one to buy cheaply or, even better, get one given to you you will have an easy to use accessory which will really earn its keep.


In parting I leave you with a link to one of Muv's (of Lizzie Leonard Vintage Sewing fame) excellent video tutorials.  If you're not familiar with her videos and blog check them out.  They are a priceless source for the care and use of vintage machines!  I cannot recommend them enough!