Showing posts with label Paper foundation piecing. Show all posts

Sunday 26 May 2013

The Log Cabin Quilt: Final!

Cast your minds back and you may remember that I used to write a blog here.  I didn't mean to stop writing but I didn't have anything to blog about as I seemed to have lost my sewing mojo.  I have read that this can happen.  Well my mojo has returned and I have some progress to report.

Remember my to do list?

Progress so far:


  • Machine baste around the outside of the quilt a quater of an inch from the edge of the quilt top
  • Trim away the excess backing and batting and square up
  • Cut two and a half inch strips of the red fabric for binding
  • Join strips using 45 degree seams
  • Attach binding
  • Wash, line dry and press

  • That's right!  Only a few minutes ago I put the final stitches into the binding on the quilt.  Thank you to follower Ken who explained how to make my hand stitching invisible.

    Finished log cabin cot quilt (thank you to The-Much-Belovéd for holding it up so well)
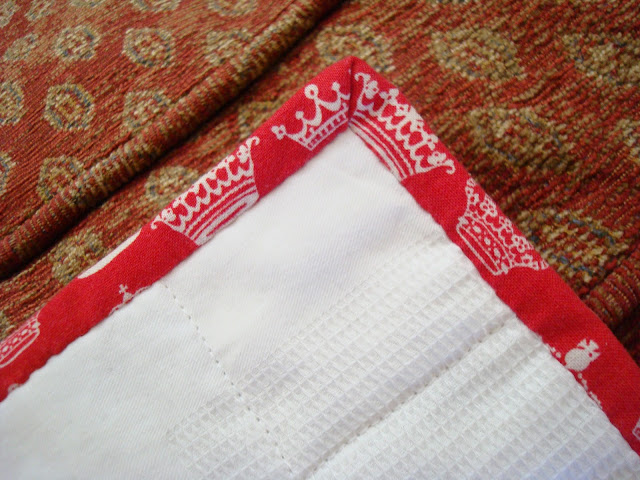
    Detail of quilting and binding back and front
    I machined the binding to the front of the quilt and then hand stitched it to the back.  Yes, it took hours!  I am happy enough with the result to make it worth the investment of time.

    How's that for a mitre?
    I am particularly pleased with the way the mitred corners worked out.  I am indebted to Lizzie Lenard's tutorial on binding.  The finish on this quilt is about a hundred times better than on my first quilt at the end of last summer.

    Well that's another project completed.  I will need to wash the quilt before I post it off to it's new owner.  I now have the excitement of starting a new project.  I wonder what's next...

    Tuesday 19 March 2013

    The Log Cabin Quilt: Progress

    Here are the log cabin blocks I have made laid out on the sitting room floor.  No design wall for me.

    Log cabin crib quilt

    Log Cabin Blocks

    Now when I started piecing these I didn't really know what I was making.  I started the green log cabins as an experiment in paper foundation piecing.  I have now made 24 log cabin blocks. That's four blocks in six different colours.  Having done this I feel that I have made as many log cabin blocks I as would like to for the time being.  I think I am tired of sewing, fabric I can't see, through a sheet of paper.

    Each of my 24 blocks will finish at seven inches square so at the moment I have a potential width of 28 inches and length 42 inches.  I think I have two options.

    1. make another 24 blocks and to create a quilt top 42 x 56 inches
    2. take what I have and use borders to bring the quilt top up to a similar size
    I have decided that I am going to go with the second option.  Thinking about borders and my small fabric stash some kind of pieced 'scrappy' border is going to the answer.  I used piano keys for the border on my first ever quilt and enjoyed making them and the finished look of them.

    Having looked at the scraps I have available I think I am going to use the red from the middle of the log cabins to add a narrow sashing border around the outside of the 24 log cabins.  Then I am going to use strips of the printed fabric, alternating with strips of the remaining white, to make the piano key border around that.  I am hoping that the red will frame the  log cabins and that the alternate white strips will prevent the outer border from over powering the centre blocks.  We will see.

    Chain Piecing with the Singer 28K - Note the seam guide set for a scant quarter inch

    Here I have started chain piecing one and a half inch strips to make the border.  This is the first time I have used this technique and I like the way it seems to save time and thread.

    Pressing Chain Pieced Piano Keys - please excuse my ironing board cover.

    These piano keys waiting to be snipped apart and trimmed open.

    Making a decision about where this quilt top is going next has reawakened my interest and excitement in this project.  I am already thinking about what style of quilting will suit this patchwork.

    Monday 4 March 2013

    More on the Log Cabin Blocks

    This is one of my completed paper foundation pieced  log cabin blocks.  Note the wide, uneven, margin of paper all around the outside of the fabric.  Although the foundation will remain in place until I join the blocks together I fear this wide margin will make that joining near impossible.


    This is the same block flipped over so that the paper foundation shows.  That uneven margin will need to be trimmed to the same width on all of the blocks.


    I line the first quarter inch mark on my ruler up with the printed outline on the foundation and trim with my rotary cutter.


    I can then join matched blocks in the manner of a four patch unit by sewing along the printed line on the foundation, nesting the seams in the way that I have been taught.  Here are the first two blocks of a four patch coming together.  Note the neat narrow margins on the foundation pieces which give the quarter inch seam allowance I am looking for.


    Here is a complete unit.  Colour matched log cabin blocks sewn as a four patch block in a setting that I have seen called sunshine and shadow.  Only a few more to go before I have something nearing the size of a cot.


    Wednesday 27 February 2013

    Piecing By Numbers with the Singer 28K


    This is a technique I am trying to teach myself from instructions I found on the internet.  It's sometimes call Paper Foundation Piecing and I've also seen it referred to as Stitch and Flip.


    I start each block with a paper foundation.  I designed this simple log cabin foundation using the table function which is part of word processing software.  If you look closely at the photograph you can see that each piece of the block has a number starting with 1 in the darkest square at the middle of the foundation.  The shading on my paper foundation is a nod to what I have read about the tonal values of traditional log-cabin blocks.

    The next step (for my block) is to cut some fabric.  The blue is the left overs of some super smooth shirting I picked up online very reasonably and the white is from one of my shirts whose collar and cuffs were past their best.  I have started to cut one and a half inch strips half an inch longer than pieces on the foundation.  This gives me my quarter inch seam allowances.

    Here I have flipped the paper foundation   and pinned my first piece of fabric over the back of the correct section.  I hold the paper up to the light to help me centre the fabric.  Notice that I have used red for the centre.  The story goes that the middle square of the log cabin block is supposed to represent the hearth of the cabin and so it is often red to indicate that fire that would have burned there.  I like a good story don't you?

    Here I have layered the number two piece of the fabric on top of the first.  The next step is to flip the paper foundation back over and carefully carry it to the sewing machine without anything shifting.  Next time I will layer first and  then pin I think!

    Singer 28, Singer 28K, threaded

    My lovely 1899 Singer 28K

    This is where I start and where I finish.  I aim for about a quarter of an inch before and after the outline on the foundation.

    I then continue adding strips, pressing with a dry iron as I go, following the numbers and tonal value already printed on the paper foundation.  When finished the block looks like this:

    Nice?

    The paper foundation stays with the completed block until I am ready to set the blocks and piece them into a quilt top. At the moment each block takes about an hour to piece (including cutting time) so I suppose I am some way off that.